On-boarding to the Domain Name Service (DNS) management portal guide
Follow this guide to set up your account and on-board the rest of your team to the latest government DNS management portal, provided by Liverton Security. If your agency did not use the previous version of the portal, contact the domain service to find out more about signing up.
Contact and support
DNS service
Email: domains@digital.govt.nz
Phone: 04 460 2299
Liverton Security (technical help)
Freephone: 0800 536 7999
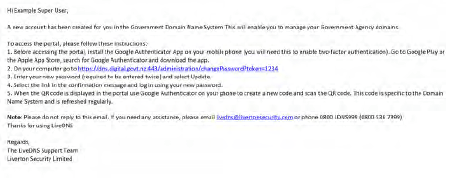
1. Provide your details and check your email
If you haven’t received an email notifying you of your new account, get in touch with domains@digital.govt.nz and provide your:
- name
- email address
- mobile number for SMS verification.
If you’ve already received an email invitation, we’ll have populated this information using the details you provided in the previous version of the portal. Email us if any of these are out of date and need to be changed.
You’ll need access to the mobile number you provided to complete signing up.
The email notification of your new account includes a link to the dns.digital.govt.nz where you can set your password and verify your mobile number. Click this link.
If you’ve forgotten your password visit dns.digital.govt.nz and click ‘Forgot your password?’
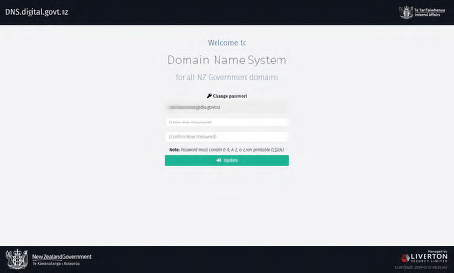
2. Set your password and verify your mobile number
Choose the password you’ll use to log on to the management portal. It must be:
- at least 10 characters
- include at least 1 uppercase and lowercase letter
- 1 digit, and
- 1 special character, such as @, %, # or $.
Make sure you use a password you don’t use anywhere else. Click update.
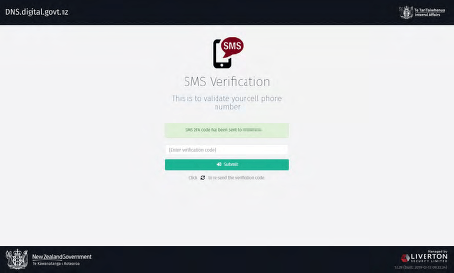
If your password meets the character requirement, you’ll be prompted to verify the mobile number you provided us with.
You should receive a 6-digit code by text, which is valid for 24 hours.
Input this code in the SMS Verification screen.
3. Download a 2-factor authentication (2FA) app for your phone
Instead of using SMS for 2FA, you need to install a token-based 2FA app like Google Authenticator, available on iOS and Android devices. Other options include Authy and Microsoft Authenticator.
This type of 2FA is more secure than relying on a transferable mobile number and more resilient in situations where mobile networks are unavailable.
If you have trouble accessing a 2FA app on your device, get in touch with the domain service at domains@digital.govt.nz.
4. Log in for the first time and set up your 2FA
Return to the login screen and enter your email address and the password you set earlier.
If you’ve lost track of where you are in the sign-up process, return to dns.digital.govt.nz at any time and click ‘Forgot your password?’ to start again.
The first time you log in, you’ll be presented with a QR code.
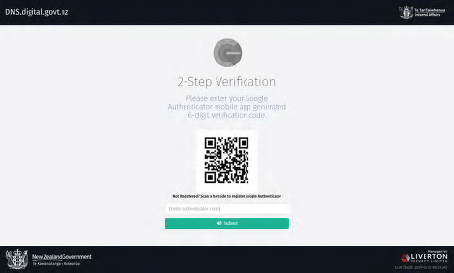
Follow the instructions in your authenticator app to scan the QR code.
In Google Authenticator, press the + sign and select ‘Scan barcode’. This saves your 2FA information in the app under your email address and the name ‘LivertonSecurityDNS’.
You only need to complete this step once – when you log on again, just input the 6-digit code provided by the app.
Once you’ve scanned the QR code, input the 6-digit code and press Submit.
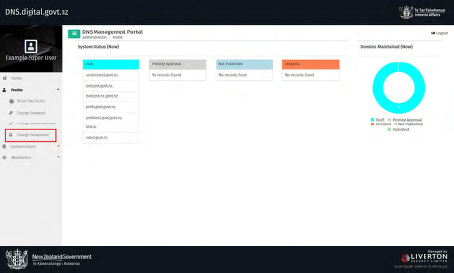
Your 2FA is now set up and you’ll be taken to the home screen.
5. Set a passphrase
Now that you’re logged on, you have full access to the management portal. Under the ‘Profile’ section you can:
- change the phone you use for 2FA
- change your password
- set a new mobile number
- set a passphrase - you should do this now.
Changing your passphrase
Go to the ‘Change Passphrase’ page and enter a memorable phrase over 24 characters in length.
This phrase will be used to verify your identify if you need to call Liverton Security tech support 0800 536 7999 to make DNS changes or access your account.
Setting a passphrase now will save the time it takes to process your request in an emergency situation.
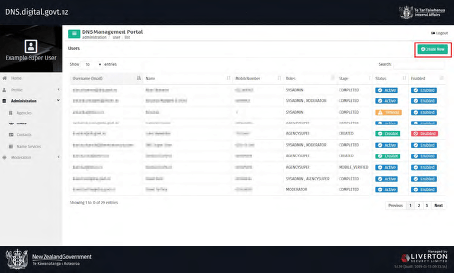
6. Add other users from your agency
You can view, create and manage users in your organisation via the users tab in the administration section.

Create new users
Click ‘Create New’ to set up a new user — you must be an Agency Super User to manage users.
If you're not, contact the Agency Super User in your organisation, or the domain service at domains@digital.govt.nz.
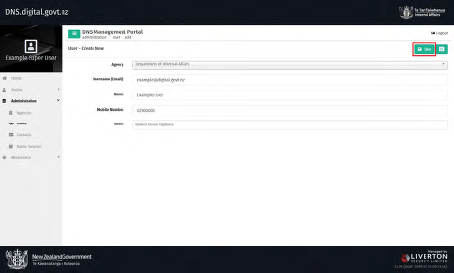
All users need access to the email and mobile number provided to complete their first login.
The email address associated with an account is permanent. If you need to change the email address, you’ll need to create a new account.
Accounts can only be deleted until the user has completed the first-time login process – after this, the account can only be disabled.
User roles
The roles field has 2 options, AGENCYSUPER (super user) and AGENCYUSER (agency user).
Super User abilities
- can create and edit other users
- manage zones and request domains.
Super User requirements
- should be permanent employees of your organisation
- have a good understanding of DNS.
An Agency User:
- can manage and request new domains.
You can use the Agency User role for other members of your team, including vendors.
At least 2 employees will have been set up when your agency first signed up to the DNS management portal.
When you’ve completed the fields, click ‘Save’ and return to the Users page. This automatically sends an email to the user you’ve created with a link to log in.
Other Agency Super Users are notified every time a user is created.
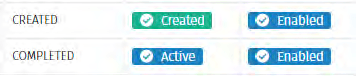
Once you’ve set up other users, you can check their status on the Users page.
When they’ve successfully completed all the steps in this guide, new users will move from ‘Created’ to ‘Completed’ status.
When a user leaves your agency
If a user leaves your agency, go to their user page and set their account to ‘Disabled’. You can review which accounts are active from the Users page.
Last updated